 Skip to content
Tagging button clicks on Facebook Ad Manager is essential. It allows you to target specific actions with campaigns and access the machine learning benefits that come with the conversion targeting strategy. But finding how to tag events based on your specific website isn’t easy. The option is buried in the Events Manager.
Make sure your Facebook pixel is installed on all your website pages.
If you have Google Tag Manager installed on your site, this is easy.
- Create a new custom HTML tag.
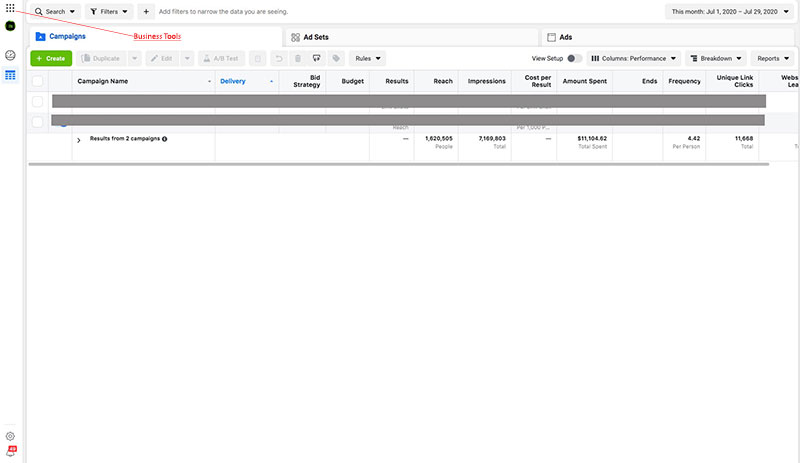
- In your Facebook account, navigate to ‘Business Tools’ > ‘Events Manager’.
- Click the green plus sign on the left sidebar .
- Click ‘Connect a Data Source’.
- Click ‘Web’ and then ‘Get Started’.
- Click ‘Facebook Pixel’.
- Enter a name for the pixel and hit ‘Continue’.
- Click ‘Continue Pixel Setup’ and hit ‘User a Partner’.
- Navigate through the settings, including audience matching, Tag Manager account selection, and website URL.
- Once you’re done, your pixel should be ready to set up events. Feel free to test the events in the event testing window.
Here’s how to tag events on Facebook Ad Manager:
-
Navigate to ‘Business Tools’ on the left sidebar of your account and click ‘Events Manager’.
-
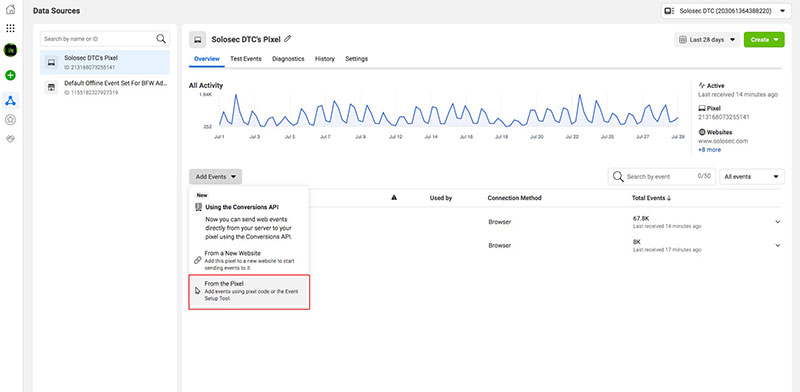
Click ‘Data Sources’.
-
Click ‘Add Events’.
-
Click ‘Launch Event Setup Tool’.
You can now click on buttons that you want to track on your website by clicking ‘Track Button’ on the setup toolbox on the top left of the window.
- When you click on a button, the event setup tool dialogue box will populate a list of options for you to use to classify the interaction on that button. This is subjective—classify the interaction however you want to.
- Note that the classification that you use is what will be reported in the Facebook Events Manager. So, if you have two events that are of the same classification, you might have trouble distinguishing between the two. In this case, it’s usually best to create a custom conversion for each.
-
Once you’ve named the event and classified it, click ‘Finish Setup’ and you should start seeing events come in.
Other Really, Really Good Ideas!
The Top ROI Marketing Tactic
What’s the Best Website Builder for Small Business? It Depends.
Rumors of the Demise of Linear TV—Greatly Exaggerated?
Generative AI Developments in the World of Advertising and Design
bfw Advertising Has Been Selected as the Advertising Partner for Blue Water Biotech’s Commercial Pro...